If you’ve recently purchased your first drone and are eager to take it for a spin, then the video titled “How to Fly Drones for Beginners” by Jake Sloan is just what you need. This informative tutorial covers the essential information that beginners like you need to know when it comes to flying drones. Learning how to fly drones can be an incredibly fun and rewarding activity, and with the guidance provided in this video, you’ll be well on your way to capturing impressive footage with your new drone.
In this tutorial, Jake Sloan shares instructions on hand launching a DJI Air 2s drone easily, as well as tips on choosing the right ND filter for your drone. He also demonstrates using quick shots for great footage with the DJI Mini 2. Additionally, Jake recommends his favorite camera and drone tech, and viewers can join his Patreon page for behind-the-scenes content and more. Safety is emphasized throughout the tutorial, and Jake encourages responsible flying in legal and open areas. So get ready to dive into the exciting world of drone flying and start mastering the art of capturing stunning aerial shots!
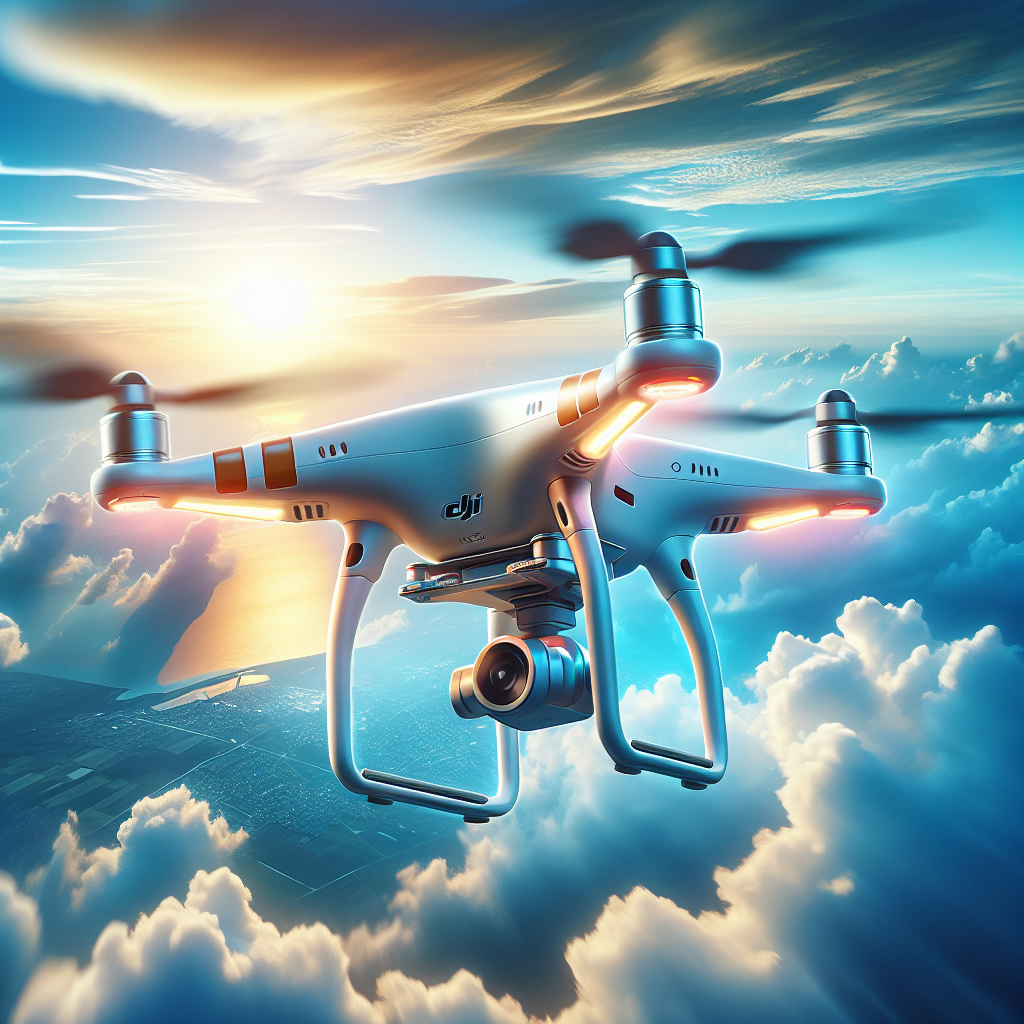
How to Fly Drones for Beginners
Hand Launching a DJI Air 2s Drone
If you have recently purchased a DJI Air 2s drone and are eager to take it for its first flight, it is important to learn the proper technique for hand launching. You want to ensure a smooth takeoff and avoid any accidents or damage to the drone.
To hand launch the DJI Air 2s drone, follow these steps:
-
Find a suitable location: Choose an open space with plenty of room to safely launch and maneuver the drone.
-
Power on the drone and controller: Turn on both the drone and controller following the manufacturer’s instructions.
-
Calibrate the compass: Prior to takeoff, it is essential to calibrate the compass. This step ensures accurate navigation and prevents any interference.
-
Hold the drone correctly: Grasp the drone firmly with one hand, making sure to avoid covering any sensors or cameras.
-
Ready for launch: With the drone securely held, gently launch it into the air, giving it enough momentum to gain altitude.
-
Maintain control: Once the drone is airborne, use the controller’s stick to adjust its position and control its movement.
Remember, practice makes perfect. It may take a few attempts to master the hand launching technique, but with time and patience, you will become more comfortable and confident.
Choosing the Right ND Filter
When it comes to aerial photography and videography, using an ND (Neutral Density) filter is crucial for achieving professional-looking results. ND filters help control the exposure by reducing the amount of light that enters the camera, allowing you to capture motion blur or create a shallow depth of field even in bright lighting conditions.
To choose the right ND filter for your drone, consider the following factors:
-
Lighting conditions: Assess the lighting conditions in which you will be flying and filming. If you anticipate shooting in bright sunlight, a higher-density ND filter (e.g., ND16, ND32) would be appropriate. For cloudy or low-light situations, a lower-density filter (e.g., ND4, ND8) may suffice.
-
Desired effect: Determine the effect you want to achieve in your photos or videos. A stronger ND filter will result in more pronounced motion blur, while a lighter ND filter allows for a clearer image with fewer artifacts.
-
Drone compatibility: Check the manufacturer’s recommendations for compatible ND filters for your specific drone model.
-
Quality and brand: Invest in high-quality ND filters from reputable brands to ensure optimal image quality and durability.
Remember to check the ND filter’s compatibility with your drone camera and follow the manufacturer’s instructions when attaching and using the filter.
Using Quick Shots with the DJI Mini 2
The DJI Mini 2 is a compact and versatile drone that offers a range of creative features, including Quick Shots. Quick Shots are automated flight modes that allow you to capture impressive footage effortlessly. From cinematic aerial pans to dynamic tracking shots, the Quick Shots feature unlocks endless possibilities for creative storytelling.
To use Quick Shots with the DJI Mini 2, follow these steps:
-
Activate Quick Shots: Open the DJI Fly app on your mobile device and select the Quick Shots mode.
-
Choose a Quick Shot mode: Select the desired Quick Shot mode from the available options, such as Dronie, Circle, Helix, or Rocket.
-
Set the flight parameters: Adjust the flight distance, altitude, and speed to suit your preferences and the desired shot.
-
Frame the subject: Place your subject in the center of the frame or select a specific target for the drone to follow.
-
Begin recording: Start recording before initiating the Quick Shot mode to capture the entire sequence.
-
Review and edit: After the drone completes the Quick Shot, review the footage and make any necessary edits or adjustments in post-production.
Quick Shots are an excellent tool for beginners and experienced drone operators alike. They allow you to achieve professional-looking shots without extensive piloting skills. Experiment with different Quick Shot modes and combine them to create unique and captivating footage.
Recommended Camera and Drone Tech
As a beginner drone pilot, it can be challenging to navigate the vast array of camera and drone technology options available on the market. To help you get started on your drone flying and filmmaking journey, here are some of Jake Sloan’s recommended camera and drone tech:
-
DJI Mavic 2 Pro: The DJI Mavic 2 Pro is a popular choice among drone enthusiasts. It features a Hasselblad camera with a 1-inch CMOS sensor, allowing for stunning image quality and effective low-light performance.
-
GoPro HERO8 Black: If you prefer a separate camera for your aerial footage, the GoPro HERO8 Black is an excellent option. It offers 4K video recording, advanced stabilization features, and various shooting modes for capturing smooth and professional-quality footage.
-
ND Filters: Invest in a set of ND filters suitable for your drone’s camera. ND filters help control exposure, reduce glare, and improve the overall image quality.
-
Extra Batteries and Memory Cards: To extend your flight time and capture more footage, always carry spare batteries and memory cards. This ensures that you have enough power and storage space to seize every opportunity for stunning shots.
These are just a few recommendations to get you started. As you gain more experience and explore your specific needs as a drone operator, you can further expand your camera and drone tech collection.
Connecting with Jake Sloan
Jake Sloan, the creator of the “How to Fly Drones for Beginners” video, is a knowledgeable and experienced drone pilot. To connect with Jake and access additional content, follow these steps:
-
Social Media: Jake Sloan can be found on various social media platforms, including Facebook, Instagram, and Twitter. Search for his profiles using the handle @jakesloan.
-
Patreon: If you want exclusive behind-the-scenes content and further engagement, consider joining Jake Sloan’s Patreon page. By becoming a patron, you’ll have access to exclusive tutorials, Q&A sessions, and other valuable resources.
-
Mailing Address: If you prefer traditional mail, you can reach out to Jake Sloan at the following address: PO BOX 212445, Anchorage, AK 99521.
Remember to show your support for Jake Sloan’s content by subscribing to his channels, liking his posts, and engaging with his content. This will help him continue creating valuable resources for aspiring drone pilots.
Understanding Legal and Safe Flying Areas
Before taking your drone for its first flight, it is essential to understand the legal and safe flying areas. This ensures compliance with government regulations and prioritizes the safety of yourself and others.
Here are some key points to consider when choosing a flying area:
-
Research local regulations: Familiarize yourself with the drone laws and regulations specific to your country, state, or region. Government aviation authorities often provide guidelines for drone operation and airspace restrictions.
-
Check for no-fly zones: Identify any restricted areas, such as airports, military installations, national parks, or densely populated areas, where drone flight is prohibited or restricted.
-
Use flight planning apps: Utilize flight planning apps, such as AirMap, Before You Fly, or DJI Fly Safe, to check airspace restrictions, temporary flight restrictions (TFRs), and other relevant information before each flight.
-
Choose open and unobstructed areas: Opt for wide-open spaces, such as parks or fields, away from people, buildings, and obstacles. This reduces the risks of collisions and ensures a safer flight environment.
-
Respect privacy: Always respect the privacy of others. Avoid flying over private property without permission and be mindful of capturing footage that could infringe on someone’s privacy.
-
Fly during daylight hours: To ensure optimal visibility and reduce risks, fly your drone during daylight hours when you can easily spot obstacles and maintain visual contact with your aircraft.
By following these guidelines and conducting your due diligence, you can enjoy flying your drone responsibly while minimizing any potential legal or safety issues.
Mastering the Controller and App
To operate your drone effectively, it is important to master both the physical controller and the accompanying app. These two elements work together to give you complete control and access to advanced features.
Here are some key features and functions of the controller and app:
-
Controller layout: Familiarize yourself with the layout of the controller, including the sticks, buttons, and switches. Each control has a specific purpose and allows you to navigate, maneuver, and adjust flight settings.
-
Connecting the controller: Ensure that the controller is securely connected to your drone before takeoff. Follow the manufacturer’s instructions for pairing and syncing the controller with your specific drone model.
-
App installation and setup: Download the dedicated app for your drone onto your mobile device. Install and set up the app following the provided instructions. This will allow you to access additional features, adjust camera settings, and monitor telemetry data.
-
Camera control: Depending on the drone model, the controller may have buttons or switches dedicated to camera control. Familiarize yourself with these functions to adjust camera settings, capture photos, and start or stop video recording.
-
Telemetry data display: The app provides real-time telemetry data such as altitude, distance, battery level, and GPS positioning. Pay attention to this information to ensure safe and efficient flight operations.
By practicing with the controller and app, you will become more comfortable navigating the controls, accessing various features, and optimizing your drone’s performance.
Operating the Drone with the Left and Right Stick
To fly a drone successfully, it is crucial to understand how to operate it using the left and right stick of the controller. The left stick controls the drone’s position, while the right stick controls its movement.
Here is a breakdown of the functions of each stick:
Left Stick:
-
Upward movement: Pushing the left stick upwards will make the drone ascend into the air. This control allows you to increase altitude or climb higher.
-
Downward movement: Pushing the left stick downwards will initiate a descent, bringing the drone closer to the ground. Lowering the altitude provides a different perspective and enables closer proximity to the subject.
-
Leftward movement: Pushing the left stick to the left will cause the drone to move laterally to the left. This control allows you to adjust the drone’s position horizontally.
-
Rightward movement: Pushing the left stick to the right will make the drone move laterally to the right. This control allows you to fine-tune the drone’s horizontal position.
Right Stick:
-
Forward movement: Pushing the right stick forward will make the drone move forward in the direction it is facing. This control allows you to fly the drone away from your position or toward a specific subject.
-
Backward movement: Pulling the right stick backward will cause the drone to move backward, opposite to its current direction. This control allows you to fly the drone backward or retreat from a subject.
-
Leftward movement: Pushing the right stick to the left will make the drone slide sideways to the left. This control allows for lateral movement and smooth tracking shots.
-
Rightward movement: Pushing the right stick to the right will make the drone slide sideways to the right. This control enables precise positioning and dynamic shot framing.
By mastering the left and right stick controls, you will gain greater control over your drone’s movement, position, and flight path. Practice different maneuvers and experiment with various combinations to become more proficient in piloting your drone.
Utilizing Additional Features
Modern drones come equipped with various additional features that enhance the flight experience and creative possibilities. These features, accessible through the controller or app, offer greater flexibility and control when capturing aerial footage.
Here are some essential additional features to explore:
-
Pause button: The pause button allows you to freeze the drone’s position in mid-air. This feature proves useful when you need to compose a shot, assess the surroundings, or take a break.
-
Return to Home button: The return to home button brings the drone back to its takeoff point automatically. This feature is helpful in case of emergencies, low battery, or when you lose sight of the drone.
-
Flight modes: Most drones offer different flight modes, such as cinematic mode, sports mode, or beginner mode. These flight modes adjust the drone’s responsiveness, speed, and maneuverability to suit different shooting styles and skill levels.
-
Intelligent flight modes: Intelligent flight modes, such as Follow Me, Waypoints, and ActiveTrack, allow the drone to autonomously track and follow a subject or fly along pre-programmed routes. These modes enhance the smoothness and precision of your shots.
-
Obstacle avoidance: Some drones are equipped with obstacle avoidance sensors that detect and avoid potential collisions with objects in their flight path. Familiarize yourself with these sensors and understand their limitations.
Take the time to experiment with these additional features and understand how each one can enhance your drone flying and filmmaking capabilities. Always refer to the user manual or consult online tutorials for a comprehensive understanding of your drone’s specific features.
Unfolding and Turning on the Drone
Before taking your drone for its first flight, it is crucial to unfold and turn it on correctly. Proper unfolding ensures that the drone is ready for takeoff, while following the correct turning-on procedure ensures a stable and error-free flight.
Here is a step-by-step guide to unfolding and turning on your drone:
-
Remove the gimbal cover: Start by removing the gimbal cover, which protects the camera and gimbal during transport. Set the cover aside in a safe place.
-
Unfold the drone legs: Most drones have foldable legs that need to be unfolded before flight. Check your drone’s user manual or instructional videos for the specific unfolding process for your model.
-
Battery installation: If the drone’s battery is removable, insert the fully charged battery into its designated compartment, ensuring a secure fit. Follow the manufacturer’s instructions for proper battery installation.
-
Turn on the drone: Locate the power button on your drone, which is usually located on the side or bottom. Press and hold the power button until you hear a series of beeps or see indicator lights flashing. This indicates that the drone is turning on and initializing.
-
Wait for initialization: Depending on your drone model’s specifications, wait for the drone to complete its initialization process. This typically takes a few seconds to a minute. Monitor the drone’s status lights or app notifications for confirmation.
-
Connect the controller: Ensure that the controller is turned on and properly paired with the drone. Check the display or app connection status to verify the successful connection.
Once the drone is unfolded, turned on, and properly connected to the controller, you are ready for takeoff. Perform a pre-flight checklist to ensure that all systems are functioning correctly and that you are in a safe and legally permitted flying area.
Building Muscle Memory and Control
To become a skilled drone pilot, it is essential to build muscle memory and develop precise control over your drone’s movements. Just like any physical skill, practice and repetition are the key to honing your piloting skills.
Here are some tips for building muscle memory and control:
-
Start with basic maneuvers: Begin by practicing basic maneuvers such as hovering, ascending, descending, and turning. Focus on gradually improving your control and accuracy in executing these movements.
-
Set up an obstacle course: Create an obstacle course with cones, hoops, or other markers to simulate real-world flying scenarios. Challenge yourself to navigate the course accurately and efficiently, improving your maneuvering skills.
-
Fly in different directions: Practice flying your drone in various directions, including forward, backward, left, and right. This helps you develop a better understanding of the drone’s orientation and improves your response time.
-
Vary your flight speed: Experiment with different flight speeds to gain a sense of how the drone handles at different velocities. Slow and precise movements are beneficial for cinematography, while faster speeds allow for dynamic shots.
-
Practice smooth transitions: Focus on achieving smooth transitions between different movements, such as combining a turn with an ascent or a descent. Smooth transitions contribute to fluid and visually appealing footage.
-
Simulate different shooting scenarios: Mimic real-world shooting scenarios during your practice sessions. For example, try capturing footage of a moving subject or framing specific compositions to replicate the challenges you may encounter in actual shoots.
Remember to practice in open areas free from obstacles and adhere to local drone regulations. Gradually increase the complexity of your maneuvers and challenge yourself to improve your skills with each flight. With time and dedication, you will develop muscle memory and gain better control over your drone.
Capturing Good Footage with Auto Mode
Auto mode is a helpful tool for beginner drone pilots who want to capture good footage without diving into manual settings right away. Auto mode allows the drone’s camera to adjust settings automatically, ensuring optimal exposure and image quality.
Here are some tips for capturing good footage with Auto mode:
-
Lighting conditions: Auto mode performs best in well-lit conditions with balanced lighting. Avoid shooting in extreme lighting situations, such as high-contrast scenes or direct sunlight, as Auto mode may struggle to meter exposure accurately in these conditions.
-
Framing the shot: Pay attention to the composition and framing of your shot. Auto mode may not always prioritize the subject or scene as you envision it, so be mindful of framing and adjust the drone’s position accordingly.
-
Camera tilt: Experiment with tilting the camera up or down to change the perspective and capture different angles. Auto mode will adjust exposure based on the camera’s tilt, so be mindful of its impact on the overall shot.
-
Smooth camera movements: Utilize the gimbal control to maintain smooth camera movements throughout your footage. This adds visual appeal and helps create professional-looking shots.
-
Test different flight paths: Explore various flight paths and angles to capture different perspectives of your subject or scene. Move around the subject, adjust altitude, and experiment with different camera angles to find the most visually appealing shots.
While Auto mode provides convenience and ease of use, it is essential to learn and understand manual settings to unlock the full creative potential of your drone’s camera. However, Auto mode serves as an excellent starting point for beginners to capture good footage while getting familiar with their drone’s capabilities.
Adjusting Manual Settings and ND Filters
To achieve full creative control over your drone’s camera, it is important to understand and adjust manual settings. Manual settings allow you to tailor exposure, white balance, shutter speed, and other parameters to match your desired aesthetic and shooting conditions.
Here are some key manual settings to consider:
-
Exposure: Adjusting the exposure compensation allows you to control the brightness of your footage. Increase exposure compensation for brighter scenes and decrease it for darker scenes.
-
White balance: Selecting the appropriate white balance setting helps achieve accurate color reproduction in different lighting conditions. Experiment with the white balance presets or set a custom white balance for optimal color accuracy.
-
Shutter speed: Adjusting the shutter speed controls the amount of light that enters the camera and affects the motion blur in your footage. Change the shutter speed to capture motion blur or freeze fast-moving subjects.
-
ISO: The ISO setting determines the camera’s sensitivity to light. Lower ISO values are preferable in well-lit conditions to reduce noise, while higher ISO values can be used in low-light situations.
-
ND filters: Neutral Density (ND) filters are essential accessories for drone photography. ND filters reduce the amount of light that enters the camera, allowing for longer exposure times and smoother footage. Experiment with different ND filter densities to achieve the desired cinematic effects.
Understanding and adjusting these settings may take time and practice. Experiment with various combinations to find the optimal settings for your desired shots and shooting environment. Regularly review and adjust your settings based on changing lighting conditions and creative preferences.
Balancing Obstacle Avoidance and Manual Flying
While obstacle avoidance features are a valuable asset in ensuring the safety of your drone, it is important to strike a balance between relying solely on obstacle avoidance and learning to manually fly the drone. Manual flying skills are essential for more precise control and creative maneuvering.
Here are some considerations for balancing obstacle avoidance and manual flying:
-
Trust but verify: Obstacle avoidance systems are designed to help you avoid collisions automatically, but they are not foolproof. Always fly with caution, maintaining visual contact with the drone, and be prepared to take manual control if necessary.
-
Understand the limitations: Familiarize yourself with the range and capabilities of your drone’s obstacle avoidance sensors. Different drones employ various sensors, such as downward-facing, forward-facing, or all-around collision detection. Knowing their limitations helps you make informed decisions during flights.
-
Practice manual flying skills: Regularly practice manual flying skills to become proficient at precise control and maneuvering. This includes navigating tight spaces, flying in windy conditions, or executing complex flight patterns.
-
Utilize obstacle avoidance as a safety net: Use obstacle avoidance as a safety net, especially in situations where your focus is divided between piloting, framing shots, and capturing footage. However, do not solely rely on this feature, as it can have limitations in certain conditions.
-
Continuous monitoring: Keep a watchful eye on your drone’s surroundings, both in the live video feed and visually, to ensure that the obstacle avoidance system is functioning correctly and to detect any potential hazards that may not be recognized by the sensors.
By cultivating both obstacle avoidance awareness and manual piloting skills, you will become a well-rounded drone pilot who can confidently navigate various flight scenarios while maintaining safety and creativity.
Exploring Smart Features and Pre-Programmed Flight Paths
Many drones come equipped with smart features and pre-programmed flight paths that enhance the creative possibilities and simplify complex maneuvers. These features allow for more advanced aerial shots and take your drone footage to new heights.
Here are some smart features and pre-programmed flight paths to explore:
-
Follow Me mode: In Follow Me mode, the drone tracks a subject autonomously while keeping it in the frame. This mode is particularly useful for capturing dynamic shots of moving subjects, such as cyclists, runners, or vehicles.
-
Waypoints: Waypoints allow you to pre-plan a flight path for your drone, specifying the exact GPS coordinates for it to follow. This feature is ideal for capturing consistent footage of specific landmarks or establishing shots.
-
Point of Interest (POI): With the POI mode, you can select a point of interest for the drone to orbit around while maintaining a fixed distance and camera angle. This mode adds a more dynamic and cinematic element to your footage.
-
ActiveTrack: ActiveTrack enables your drone to track and follow a moving subject while maintaining focus and framing. This feature is useful for capturing action shots or filming yourself during outdoor activities.
-
QuickShot modes: QuickShot modes, as mentioned earlier, allow you to capture cinematic shots automatically. Explore the various pre-programmed flight paths, such as Dronie, Circle, or Helix, to capture impressive and visually engaging footage effortlessly.
-
360-degree panoramas: Some drones offer the ability to capture breathtaking 360-degree panoramas. This feature allows you to create immersive landscape shots or capture expansive views in a single image.
Experiment with these smart features and flight paths to add creativity and variety to your aerial footage. While convenient, remember to use these features mindfully and appropriately, ensuring they align with your creative vision and the specific requirements of your shot.
Practicing and Mastering Drone Flying
Practicing regularly and dedicating time to honing your drone piloting skills is crucial for becoming a proficient and confident drone pilot. Drone flying is a skill that requires practice, patience, and continuous learning.
Here are some tips for practicing and mastering drone flying:
-
Fly in different weather conditions: Take advantage of different weather conditions to practice flying in various environments. While maintaining safety, expose yourself to different wind speeds, light conditions, and temperatures to understand how they affect your drone’s performance.
-
Try new flight maneuvers: Continuously challenge yourself by attempting new flight maneuvers and techniques. Practice flying in figure-eight patterns, executing banking turns, or mastering precise landings. This expands your piloting skills and helps you navigate various filming scenarios confidently.
-
Fly different types of drones: If possible, try flying different types and models of drones. Each drone has its own flying characteristics and quirks. By familiarizing yourself with different drones, you will become a more adaptable and versatile pilot.
-
Learn from experienced pilots: Engage with the drone community and learn from experienced pilots. Seek advice, watch tutorials, and participate in online forums to gain insights, tips, and tricks from those with more experience.
-
Stay up to date with technology: Follow advancements in drone technology and stay informed about firmware updates for your specific drone model. Implementing updates and leveraging new features ensures that you are always flying with the latest technology and improvements.
Remember, practice is the key to mastery. Dedicate time to regular flying sessions, build flight experience, and embrace the joys and challenges of drone piloting. Enjoy the learning process and the unique perspectives that aerial photography and videography offer.
Paid Course for Advanced Techniques and Filmmaking
For those interested in expanding their drone flying skills and delving into more advanced techniques and filmmaking, Jake Sloan offers a paid course. This course is designed to take your drone piloting skills to the next level and explore the creative possibilities of aerial cinematography.
Here are some highlights of the paid course:
-
Advanced maneuvers: Learn advanced drone maneuvers such as orbiting, tracking shots, orbiting while ascending or descending, and advanced aerial camera movements.
-
Cinematic storytelling: Discover techniques and strategies for capturing cinematic storytelling through aerial footage. Learn how to compose shots, create dynamic sequences, and evoke emotions through your visuals.
-
Editing and post-production: Gain insights into editing and post-production techniques specific to drone footage. Learn how to enhance the visual impact of your shots, color grading, and incorporating drone footage into your film projects.
-
Leveraging additional camera and drone tech: Explore more advanced camera and drone technologies, including equipment upgrades, filters, lenses, and accessories, to achieve the highest quality footage.
The paid course offers a comprehensive and in-depth learning experience catered to drone enthusiasts who are eager to expand their skills and take their drone footage to a professional level. To access the course, follow the link provided in the video or description.
Prioritizing Safety and Responsible Flying
Above all else, safety and responsible flying should always be prioritized. As an aspiring drone pilot, it is your responsibility to operate your drone in a manner that ensures the safety of yourself, others, and the environment.
Here are some key safety and responsible flying practices:
-
Follow local regulations: Familiarize yourself with the drone laws and regulations in your country, state, or region. Adhere to the guidelines set forth by aviation authorities to ensure lawful and safe drone operation.
-
Maintain visual line of sight: Always keep your drone within your visual line of sight during flight. Losing sight of the drone can lead to potentially dangerous situations and accidents.
-
Respect no-fly zones and restricted areas: Avoid flying near airports, military facilities, national parks, or other restricted areas. Observe any airspace restrictions and ensure that your flight activities do not infringe on the privacy or safety of others.
-
Fly in suitable weather conditions: Be aware of weather conditions and avoid flying in high winds, rain, or adverse weather conditions that may affect your ability to control the drone safely.
-
Respect privacy: Always respect the privacy of individuals and property. Avoid flying over private property without permission, and refrain from capturing footage that may invade someone’s privacy.
-
Conduct pre-flight checks: Before each flight, perform pre-flight checks to ensure that your drone is in proper working condition. Inspect the propellers, battery, and any other crucial components to mitigate the risk of malfunctions mid-flight.
-
Monitor battery levels: Keep a close eye on your drone’s battery levels and ensure that you have enough power to safely complete your flight. Rely on accurate battery monitoring systems and plan your flight accordingly.
-
Be mindful of wildlife: When flying in natural areas, be considerate of wildlife and their habitats. Avoid disturbing or causing stress to wildlife by maintaining a safe and respectful distance.
By embracing safety and responsible flying practices, you foster a positive reputation for drone pilots and contribute to the overall safety and acceptance of drones in society. Always prioritize safety above all else and ensure that your flights are both enjoyable and responsible.
In conclusion, learning how to fly drones is an exciting and rewarding journey. By following the instructions in this comprehensive guide, you are well on your way to becoming a skilled and responsible drone pilot. Remember to practice regularly, stay informed on regulations, and prioritize safety in all your flights. As you gain confidence and experience, the possibilities for creatively capturing breathtaking aerial imagery are endless. Enjoy your drone flying adventures and happy flying!