In this article, you will find a tutorial video by HASAKEE that will guide you through the process of setting up and taking off with the Q9S Drone. The video provides step-by-step instructions to ensure a smooth and successful setup. From unboxing to calibrating, this tutorial covers all the necessary details to help you get your drone up in the air and ready for an exciting flight.
The video starts with an upbeat musical introduction and then dives right into the tutorial. With clear visuals and concise explanations, the video will walk you through each stage of the setup process, ensuring that you have a hassle-free experience. Whether you’re a beginner or have some experience with drones, this tutorial will equip you with the knowledge needed to handle the Q9S Drone effectively. So, get ready to embark on a thrilling drone journey with the help of this informative and user-friendly tutorial video by HASAKEE.
How to Set Up the Q9S Drone Tutorial Video by HASAKEE
Welcome to this comprehensive tutorial on how to set up the Q9S Drone by HASAKEE! In this tutorial, we will guide you through the entire setup process, from unboxing the drone to syncing the remote control. By the end of this tutorial, you will have a fully functional Q9S Drone ready for takeoff. So let’s get started!
Introduction to the Q9S Drone
The Q9S Drone is a remarkable piece of technology that offers a range of exciting features and capabilities. With its sleek design and advanced flight controls, this drone is perfect for both beginners and experienced drone enthusiasts. Equipped with a high-quality camera, the Q9S Drone allows you to capture stunning aerial photos and videos. Whether you’re looking to explore beautiful landscapes or document your adventures, this drone is your perfect companion.
Unboxing the Q9S Drone
The first step in setting up your Q9S Drone is unboxing it. When you open the package, you will find the drone itself, the remote control, a set of propellers, landing gear, a battery, and a user manual. Take a moment to familiarize yourself with all the components before moving on to the next step.
Charging the Q9S Drone
Before you can take your Q9S Drone for a flight, you need to make sure it is fully charged. Connect the provided USB charging cable to the drone’s battery port and the other end to a USB power source. The drone’s LED indicator will turn red to indicate that it is charging. Once the indicator turns green, you can disconnect the charging cable, and your drone is ready for the next step.
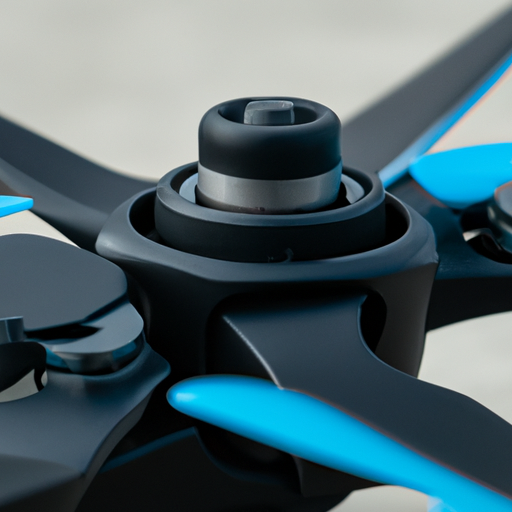
Installing the Propellers
Now that your Q9S Drone is charged, it’s time to install the propellers. Start by identifying the A and B markings on both the drone and the propellers. Match the A-marked propellers with the A-marked motor slots and the B-marked propellers with the B-marked motor slots. Gently press each propeller onto its corresponding motor until you hear a clicking sound. Make sure the propellers are securely attached to ensure safe and stable flights.
Attaching the Landing Gear
Next, attach the landing gear to the bottom of the drone. Locate the landing gear slots under the drone’s body and slide the landing gear legs into place. Once attached, the landing gear will provide additional stability and protection for the drone during takeoff and landing. Ensure that the landing gear is firmly secured before moving on to the next step.
Inserting the Battery
With the propellers and landing gear in place, it’s time to insert the battery. Locate the battery compartment on the back of the drone and gently slide the battery into position. Make sure the battery is fully inserted and the latch is securely closed. This will provide the power needed for the drone’s flight and camera functions.
Turning on the Q9S Drone
Once the battery is inserted, you can turn on the Q9S Drone. Press the power button located on the top of the drone and hold it for a few seconds until you see the LED indicator lights illuminate. The drone will now start up and perform a self-check. Wait until the LED lights stabilize, indicating that the drone is ready for flight.
Syncing the Remote Control
To control the Q9S Drone, you need to sync the remote control. Start by turning on the remote control. Then, on the drone, locate the sync button and press it once. The LED lights on both the drone and the remote control will flash rapidly, indicating that they are in sync mode. Within a few seconds, the LED lights will stabilize, indicating a successful sync. Your remote control is now paired with the drone, allowing you to control its flight and camera functions.
Calibrating the Q9S Drone
Before taking your Q9S Drone for its maiden flight, it is essential to calibrate it. Calibration ensures accurate flight controls and stable flight behavior. Follow the instructions provided in the user manual to enter the calibration mode on the drone. Once in calibration mode, follow the on-screen prompts and perform the necessary actions to calibrate the drone. Once calibrated, the drone will be ready for a smooth and stable flight experience.
Using the Smartphone App
To enhance your experience with the Q9S Drone, you can download and use the smartphone app provided by HASAKEE. The app allows you to have a live feed of the drone’s camera on your phone, control flight modes, capture photos and videos, and access additional features. Follow the instructions in the user manual to download and install the app on your smartphone. Once installed, connect your smartphone to the drone’s Wi-Fi network and launch the app to explore its various functions.
Conclusion
Congratulations! You have successfully set up your Q9S Drone and are now ready to take it for a flight. Remember to always follow local regulations and guidelines when operating your drone. Practice in open spaces away from people and obstacles until you become comfortable with the drone’s controls. With its advanced features and capabilities, the Q9S Drone is sure to provide you with hours of aerial fun and breathtaking footage. Have a great flight!